Posts

Showing posts from April, 2010

GC 50 Found Objects

Image
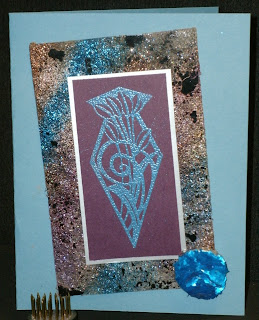
Just what do you do with those used fabric softener sheets? Well, after carrying it around in my pocket most of the day I suddenly remembered something we did some years back. I rubbed embossing ink on it, then doused it with different colors of glittered embossing power and embossed it CAREFULLY! They melt rather rapidly, but if you keep it moving it becomes a lacy object. You know me I like that "old" look, so I made sure it had holes in it. LOL I layered it onto a black card stock. The stamped image is from Stamp Zia and embossed with a flat blue powder on a purple cs, then layered onto silver and finally onto the fabric softener sheet. It all lays on a blue cs card. The odd looking semi round object is a bottle cap. I put glue all over the top and dipped it into Sapphire blue Diamonds from Suze Weinberg, let it dry and glued it onto the corner of the mat. It looks much better in real life since it sits up off the card. Now that I remembered the fabric softener li

Art Form Exchange

Image
Using blue and pink ink pads I applied the background colors. The flowers were stamped and colored with pencil. Then I used radiant pearls in blue and magenta and rubbed them all over the flower. The flowers all have glitter paint in the middle. The orange ones are really more of a coral color, but that's a scanners life! I added a silver metal flower and a rhinestone for the center. Letter beads form the word Hello, the sentiment is from Hero Arts and the flower are from Judikins.

GC Form Art Exchange

Image
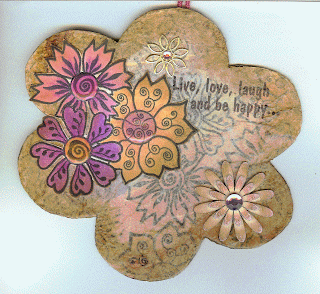
OOOOH Boy, this one almost wasn't! LOL! It started out so different, then almost hit the trash can, then I decided to pull everything off and try it again, JUST so I wouldn't have to cut 2 layers of cardboard and 1 more layer of CS. ( yeah I get pretty lazy when it come to hand cutting something) So this is the second go around: I layered pastel tissue paper ( pink, yellow & purple) Stamped the floral image with black, then added a layer of white tissue paper over all of it. The scanner didn't pick up the muted pastel colors that come through (darn!) All of this tissue paper gave it a very textured surface (love my textures) so I just had to age it around the edges! I stamped the image on white cs and colored it with pencil, trimmed it out and added Glossy Accents to the centers of each flower. The lower right flower is made of wood. I found 3 flowers and a butterfly in 1 package, at the dollar store. It has been tinted with the same ink I used for the ageing of

USA Flower Form Art Echange

Image
Rubber Munger, Rubber Necker and Rubber Romance are the background, Eagle and Statue of Liberty. I aged the basic form with ink pads, and stamped the background, I love this "We The People " stamp. The digital image of the flag was sent to me by a friend, it is so colorful and the images were great for this project. I added the Eagle head, which has been tinted with colored pencil and the statue stamped on grey paper. I found a garland of silver stars, cut off three and added them. This hands from a red, white and blue ribbon. The base for this is 2 layers of cardboard, so it makes a cool hanger.

Butterflies on a flower

Image
I joined this shape challenge, and a challenge it is turning out to be LOL! This is the first of four, and the only one finished to date! It can be hung with a loop that is out of the picture. Of course I used some of my butterfly stamps, then layers of pink and yellow tissue paper. The top butterfly is a wooden one I found at the Dollar store, sprayed it black and dry brushed some gold on it. The large on is made of about 7 layers of cs, all cut on my Cricut machine, then glued together, The wing design is also cut from the same cartridge. It is glued at the base and spacers were added to hold up the wings. Now that it is finished I want to keep it, but alas, it will be mailed out. I have two more on the nearly finished and one that is still waiting for an idea!

Shower Card

Image
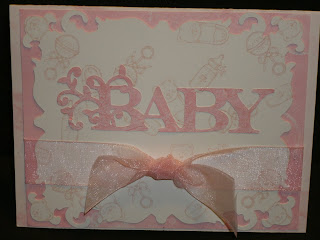
New Granddaughter is on the way ( 3 weeks to go ) and the shower is this afternoon. I used my Cricut for the layouts and the Baby, then using my Hero Arts stamps, I stamped the back ground with a soft rose ink. Pink sheer ribbon finished it off. THIS Grandma is very excited about this second granddaughter! I raised my boys, so it's BRING ON THE GIRLS for me! While the boys were growing up I would point to cute little girls and tell them I want a least two of those from each of you. The oldest really listened well! LOL Although I would like to see some little boys thrown in there too! Now if I could just get the youngest son started..................

Critter Challenge #8 Gingham

Image
Using my trusty little bear from Stamping Up, and some blue and white gingham checked paper I created this cute little card.

Stamp Something PINK Chalenge

Image
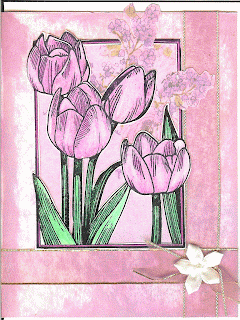
I hope everybody had a great Easter Sunday. Before dashing off to play the Easter Bunny I put together this tulip card. The Tulips are from Stamp Rosa. After coloring it, I trimmed the inside and out to make a"picture" frame, then layered it on a pink and lavender soft floral paper. I didn't want to cut off the Lilacs so I trimmed them and pulled them through to the front of the frame. The card was rubbed with a soft rose ink pad, soft lavender ink pad and a frosty pink ink pad, truth is with all the paper I own I just couldn't find the right kind of pink pattern or the right color. This turned out to be the soft background I was looking for, funny how that works! A pink trimmed in gold ribbon was added along with a white ribbon flower. This will become a thank you card for the dinner we shared with family and friend today.