Posts

Showing posts with the label die cuts

Hello NBUS #10

Image
Hostess; Darnell    Darnell  has been running her famous NBUS challenges for three weeks now.  This is the last one and what a twist she through in this week........bubble wrap.....HA! She can be a shifty character when Hammy is out and about.......but I digress (somewhat) For this NBUS challenge I chose a NBUS bicycle die that my friend Patty (one of my Paint Pals) gave to me a couple weeks ago.  I cut it out in a mirrored fuchsia card stock and used a black alcohol marker to paint the tires and seat.  The background is markers smeared on an acrylic block, spritzed with water, then smashed onto the die cut frame. ( I love this technique for backgrounds).  I inked up some small bubble wrap and gave the bike a path to ride on.  I thought the basket needed some flowers, so I found some NBUS tiny flower and leaf stamps .......I was wondering what I was going to use such a small flower stamp for......... *grin* All are mounted on a bl...

All is Calm Using Die Cuts

Image
This year I decided to use a lot of my dies to make Christmas cards.....it started that way over a month ago when I created the following two cards......(ssssh! I just finished the insides this morning ) So stating early really hasn't helped me much as I am dashing to the finish line today, so I can start sending them out this afternoon.   I love this framed tree die from Gina Marie Designs.  For this first card I did remove the center trees so I could insert my reindeer standing in the snow.  Background and snow drifts are made from a very fine glittered paper and then I added some extra snow with Pearl Pen.  The snowflake is a left-over from last year. My Time to Craft is having a challenge of Christmas Animals and I think my reindeer will fit right in.     Challenge 335 Christmas Animals      Here is the same framed tree die cut, with all the trees left in place, and an other left-over snowflake. This card I am going...

Christmas cards interrupted!!

Image
  Well, hello there! Seems like I haven't gotten to post in forever, instead of two weeks!  We no sooner got back from our Thanksgiving jaunt to the desert and things began to jump around here.  Good thing I managed to get some Christmas cards made while we were on the desert. My friend's birthday was the 28th, so I spent a couple days making her a journal with a challenge to list at least three things, daily, to be thankful for in it.  I didn't get any photos....bummer....I think it was still damp when she opened it.......ya, that's how close to the wire things have been around here. Next up was the sell of my rental......the house I grew up in.  We had it pretty well lined out, just waiting for the buyer to close escrow on a different property to get the money for my rental.  I signed the escrow papers at 8 a.m. and it closed by 3 p.m.! But it took three trips into town to get it all done. LOL! Yesterday was our #3 granddaughter's birthday, u...

The Last of Fall Colors......

Image
  I'm not positive THIS card is the LAST of the FALL colors, but I'm pretty sure it will be...LOL! It was made with a stamp and die set I picked up for a song......well close to it.  It was regularly $15.00 but I found it on the sale wall at Hobby Lobby for $5.00!!  There is a die for all the shapes but I just used the small flower die and popped it up with a pop dot.  I mixed the orange and brown ink right on the stamp for the sentiment.   I am entering it in this challenge:   Challenge 274: Fall Colors I know this is a short post.....for me (grin) but I am doing some catch up blogging this morning BEFORE starting anything else.....LOL!

Loving the Fall Colors

Image
Spring is a beautiful time of the year, all the flowers beginning to bloom, everything so green............errrrech! Wait!..... lets fast forward to the glory of all the fall colors.....the rich golds, royal reds and beaming oranges........what a delight to the eyes. Truly one of my favorite times of the year.   So I'm kicking off this week with this card full of fall colors (even says so right on the card LOL)  Bits and pieces of things laying on my desk came together here.  The pumpkins are part of one of the color "tests" I shared HERE,  I just die cut a section of one of them.  The leaf was an extra one from yesterdays post......die cut, dusted with ink and embossed.  The sentiment was inked with three Memento inks and then die cut.  I chose a black card base to make the colors pop a little more.   One, two, three......easy as can be!  Sometimes these "easy" cards rattle me as to why some just seem to fall into place and others...

Birthday Card in Fall Colors

Image
Take a couple of days away from any form of art and the PC, and Mr. MOJO comes back with his happy dance and we can't seem to make enough fast enough. Or so it seems this morning,as I was catching up on what I missed  in Blogland......honest, I was only "away" for 48 hours!!!  But more about that in a different post.     One of the products of this mornings flurries is this card.  It was one I really enjoyed making, as I dug out my embossing folders....and blew the dust off them.......it has been awhile..*grin* and had a "play" with them.  It is all pretty straight forward, used TH distressed leaves die, dusted the leaves with some ink, ran through embosser. The sentiment was just an extra that was laying on my desk, it got a little dusting too.  The background cs I found, already cut and embossed, waiting in my stash....LOL!  It all got plopped onto a brown card base.....easy peasy!!   The inspiration for this card came from all...

Layered Stamp Solution....

Image
  ....or why I was so slow in doing this!     At the beginning of summer I ordered a bundle of stamp and die sets, this is just one of them.These are from Scrapbooking Made Simple and Stacy has a video every Saturday on You Tube.   They are mostly flowers, stems and leaves.  I originally bought them to use together....stamp and die.  But I was wanting to try these stamps DTP.   Now, layered stamps have always been a nemesis of mine, you have to get them lined up "just right" or they don't turn out well.  I had heard of a MISTI stamp positioner, but they are a little too pricy for me........just one of those priority things...LOL!  I did see that there is a video on how to make your own. I had bought the items quite sometime ago, but never could get it figured out how to make it work right, using DTP stamping. (It all almost hit the trash can) Well, after watching a video See it HERE , I figured out that I ne...

T stands for One Cup at a Time

Image
  Happy Tuesday! Today is an other journal page.......I think it is becoming an obsession.....*grin* More Gesso, paint, ink, stamps, Gelatos and Pitt Pens, along with some die cuts and paper doilies.   I didn't even notice how crooked the bottom looked, until I had it uploaded....LOL! My coffee cup is sitting there, (maybe I SHOULD have added glitter to the cooked table top) as I had just finished the page, to fit right in with the T-gang over at Elizabeth's blog.   I also want to join the Art Journal Journey  with this post too.........their challenge is "Journeys" (which I will have to link up too once we are back home) This how I start my daily journey........one cup at a time. *grin*    A few of the details...Stazon ink tends to stay shinny when it has acrylic paint under it (?)       Die cuts over doilies in the upper corners.   I had this post started EARLY, as in Saturday ...

So Begins the Birthday Celebrations

Image
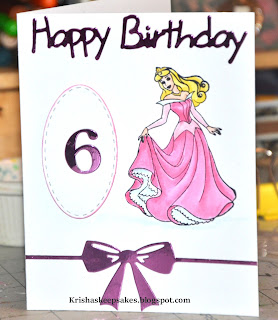
  Today is our GDs (Megan) birthday party, she is turning 6......but not until NEXT weekend. She shares a birthday with her Uncle Ken and he is turning 40 this year( next weekend's BIG celebration), so, being Megan, she decides that THIS year she will give the day to her Uncle Ken "cause he is turning 40, and I'll let him have a special day.....and I'll have all the rest!"  LOL!!  Kids!   Since I have been banned from ever buying an other birthday card for my family, this is the one I created for Megan.  She is a "purple" girl and LOVES anything glittery! I did do the inside of this card too.  This is a saying, that her and I use ALL the time.  I found it on the Cricut program and HAD to use it. When she gets to the "and a hug around the neck"  I get a big hug from her.  What's not to love about that???  I have had an other really crazy week, and not much time for creating or posting and I'm really starting to feel th...

Color Throwdown!!

Image
Well, here we are at the end of an other week, the last Friday of March.......how can it be??? :o) This morning I was carousing the neighborhood, of Blogland, and stumbled on a challenge that looked like a fun one to try.  After hours of trying to "make" it happen......am I the only one?? I finally went a totally different direction, and making myself step out of my comfort zone......just a little.  I have had this stitched diamond die set for quite a while, but haven't really used them.  I don't do much with diamond shapes and was wondering "why?" I even bought them.......am I the only one?? I made diamond shaped frames and then in-laid them into the card base.  A die cut hello for the center.  The butterfly is a remnant of the first direction I was headed, I die cut and embossed it, then rubbed some gold over it. The comfort zone thing????  Well, I would normally center, I mean totally center, the diamond shapes!  I know, it wasn't a "bi...

Breath in Deeply.........

Image
  Breath in deeply and breath out slowly......the weekend is nearly here!!   This is an other great stamp set from Stampendous that I have been playing with.  Yes, I know the chair looks all cattywampous, but it is the angle I took the photo.......honest!!!   I chose to put the marker to the stamp again, then blend and add some shading.  I am really liking NOT having the black outline on the images.  Makes more of a water color painting style....LOVE it! The inside of the card reads..." Fine a few moments to just sit back......rest your eyes".    I'm ready to hit the beach, dig my toes into the sand, sit and rest my eyes........how about you? But, in reality........the weather can't make up it's mind yet.........our Easter celebration is this weekend.....I need to get a place ready to plant some veggies..........the front flower beds desperately need attention...............and the house needs a good "spring" cleaning.....LOL!...

Stamp and Die Flowers

Image
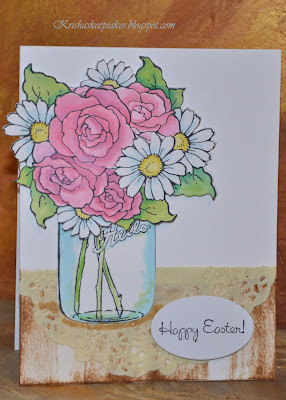
A quick offering  of a card made with a new Stampendous stamp and die set.  I have to say this is really a great set, the dies fit the images perfectly.  You get the jar and the bouquet of flowers ( stamp and die) and a few sentiments in this set. I did a double stamp and cut the bouquet, then layered them to make a larger bouquet. All had been hand painted with marker ink.  I snippet of a paper doily was added to the ink pad swiped table top.  The Happy Easter stamp is an oldie but goodie . I am entering this card here: Stamping Sensations has a month challenge of "Flower Power" in progress for the rest of the month, so there is time for you to join in the fun too. Short and sweet (?) LOL!! Inky Hugs Krisha

Rising to the Challenge a Twofer

Image
All right! A new week has begun.........Wooohooo!  Mondays have gotten such a bad wrap over the years.....having to "go" to work made me feel the same way, but retirement has changed the light on Mondays.....for me anyway.  My weekend was a total "wash out"!  With DH home we just puttered around here....watched a lot of TV ....er....he did.  I'm the one that just puttered around.  We did go to the Spring Home and Garden Show Sunday......but I'll cover that later. If you dropped by last week, you will recall I have been on a card marathon.......no, not one with a prize for finishing, or anything like that.  Just one made up in my own mind...*grin*  My cell phone has the Pinterest app on it.....yeah, I've gone tekkkkie.....LOL  So, while DH is watching all "his" programs I usually sit and play Word with Friends and scroll through Pinterest.  I found a card I wanted to CASE This pretty card was made by Biggan at http://bigganed.bl...

Embossing folder fun

Image
Hello, hello, hello again! I saw a challenge......sometime back....and thought I'd join in the fun.  I'm not sure how I got so de-railed but I didn't get these cards entered.  The challenge was: Use an embossing folder to stamp with.  Just spritz some ink on the raised side of the folder and press it onto your card stock. Fun and quick.....CAS too!  I added an embedded die cut hello and it was finished......................... BUT the embossing folder was laying there with some ink still on it........I gave it a spritz of water, inserted some card stock and ran it through the embossing machine, mounted it on a pale yellow and added a couple of die cut flowers.......DONE!   Well.............this technique is so fast and simple I just had to try it again......LOL That die cut hello really got washed out by the scanner.   This is the 2nd half of the above card, all washed out too.......hmmmmm.....I might be having a problem with...

One Last Valentine..........

Image
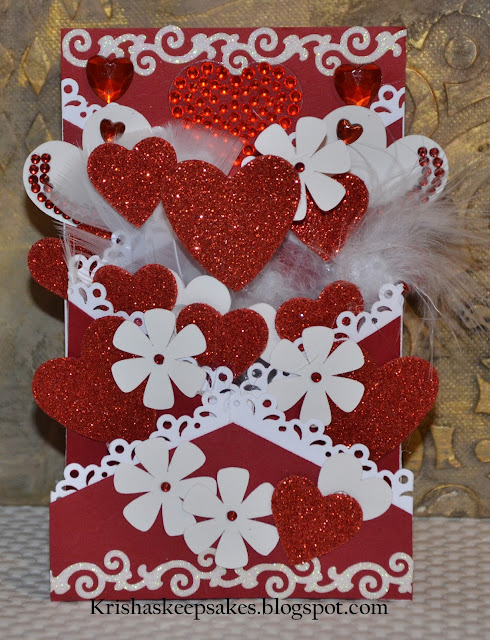
  I'm ending my posting, today, with this expanding card made for my oldest GD......like her G-ma, she loves sparklies....LOL!!   Again I am entering this card in these challenges....they are new challenges so why not join me?? Allsorts Challenge #348: Bring on the BLING My Time to Craft challenge 314: Love is all round Hiding in My Craft Room challenge 236 Freestyle Inky Hugs Krisha

More Hearts and Flowers.....and BLING!

Image
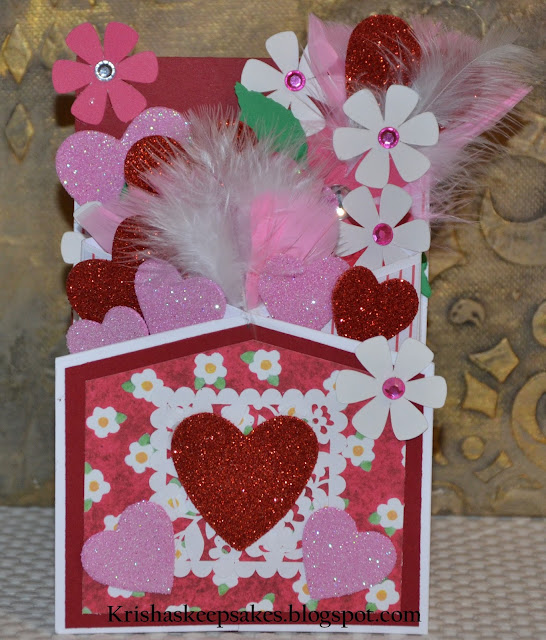
  Yes, I'm on a roll today with an other Valentine card.  This is an expanding card, where the front pulls away from the back.....kind of a honeycomb effect.   I am also entering this card in these fabulous challenges. Allsorts Challenge #348: Bring on the BLING My Time to Craft challenge 314: Love is all round Hiding in My Craft Room challenge 236 Freestyle Inky Hugs Krisha

Box cards: Hearts Galore!

Image
Welcome ladies an gentlemen, children, dogs and cats to the LAST day of January 2016! With February breathing down on us, everybody seems to feel the "love" in the air, as Valentine's Day is quickly approaching..........can it be already??  I got those Christmas cards down just in time to put up Valentines........LOL!!   Today I have a couple of box cards, that I finally finished, who knew this little buggers would take so long to make.  Well, construction was a breeze......it's all the decorating that take the most time, but my GKs are all worth it.....*grin*   around the bottom As you can see I did have some fun with sparklies, feathers and glittered foam hearts, along with a LOT of die cuts.  Minnie is an old Disney stamp I have had for YEARS!  She was stamped, colored and fussy cut before being mounted on a clear plastic strip ( so her feet would show) There are quite a few challenges going on right now that these would fit in...