Posts

Showing posts from August, 2010

More Scraplings

Image
The last 10 days have been sooooo busy around here, between taking a 4 yr. old shopping ( and not finding anything that is still summer wear, hard to buy long sleeves when it is 107' ) then, it was get ready for the big B-day party; oh my Grandma hasn't gotten a gift yet. So off to shop after work. Getting off a 6PM only leaves a couple of hours to find it and buy it!!! Tracking down the Twinkle toes from Sketchers was the biggie! I did manage to get a few more scraplings finished after my youngest son and DIL left. Oh and they are expecting a baby in December! ANYWAY, I'm so tired tonight I can't remember who's stamps I used, then they wouldn't lay flat on the scanner ( bummer!) I guess it is Monday for the whole 24 hours.....LOL. Such fun little things to make, but now I have to decide which ones will be sent off for the swap. If you are interested in swapping some scraplings Gingersnap Creations has one open to all at: http://gingersnapcreations.blogspot.com

I had to share this e-mail from a friend...God love Her

Stranger In My Mirror © Rose Madeline Mula Please be careful. This person has found her way into my house and could also get into yours. A very weird thing has happened. A strange old lady has moved into my house. I have no idea who she is, where she came from, or how she got in. I certainly did not invite her. All I know is that one day she wasn't there, and the next day she was. She is a clever old lady and manages to keep out of sight for the most part, but whenever I pass a mirror I catch a glimpse of her. And, whenever I look in the mirror to check my appearance, there she is hogging the whole thing, completely, obliterating my gorgeous face and body. This is very rude! I have tried screaming at her, but she just screams back. The least she could do is offer to pay part of the rent, but no. Every once in a while, I find a dollar bill stuck in a coat pocket, or some loose change under a sofa cushion, but it is not nearly enough. I don't want to jump to conclusion

My first scrapling.

Image
Scraplings are a mini type card that is 1 1/2" wide and 4 1/4" long, or the other way around. They are made with paint chips or sample paint strips from local paint retailers. Since I keep forgetting to pick some up while in the neighborhood, and the nearest place for me to get these is over 10 miles away. I'm not crazy about the little white line between the colors, so I made my own. When the sweat from my water bottle fell onto my chip I just moaned, and put it aside. When I saw what it looked like when it dried, I added a few more drips and kinda manipulated them, very cool. LOL Out came one of my dragonfly stamps and a charm to finish it up. Don't ya just love it when an OOPS! becomes just what ya were looking for? Now onto getting 4 done for the Gingersnap challenge. Don't belong to the Gingersnap Creations group? go to this site and sign up: http://groups.yahoo.com/group/gingersnapcreations/ It is a very fun place to be, and the groups is sooooo

WOYWW

Image
Well, here it is in all it's glory.....my work station. I'm getting ready to start some scraplings for a swap over at Gingersnap Creations. Just finished 3 other cards for swaps, so the station is relatively clean for the moment. Tomorrow after work I'll get started on the scraplings ( color chips from the paint store ) Since I keep forgetting to pick some up, while in that area I just made my own. =-O I don't like the white strip that separates the colors anyway LOL. I know it looks like I work in the dark, but there really is very good lighting there, I just had to turn off one and point the middle one down for the picture.

Time To Hit The Road

Image
FINALLY! After 5 attempts I got this card finished I knew what I wanted to do, but just couldn't get it right. What the scan doesn't show is the image is done with paper piecing, then it is also stamped on the acetate and over laid on the paper piecing. I did it this way because I did some painting on the back side of the acetate. It is framed with a copper tape I've had for years, that is what hold the two layers together. I LOVE MY DIAMONDS STAMPS! They just seem to fit my sense of humor. This image is VERY close to my DH, myself and our dog Dyna. I have a few friends that will tell you I resemble this old lad when it is Time To Hit The Road!! STAY OFF THE SIDEWALKS LOL!!!

One More summer card

Image
One more time with my favorite sun image. This was stamped on black glossy cs, with a light color pigment then a gold mixed with a glittered embossing powder was put on it, then set. The face was hand painted white, let dry then the yellow and red were added. over the top of the face is Glossy Accents. This was mounted on a satin finish gold, then red glossy. The texture to the right is a fabric softener sheet that I rubbed red and yellow pigment ink on it. Next I added gold glittered and red glittered embossing powder. When it is melted with the heat gun the softener sheet will melt and pull apart in areas. I have done this many times before and you have to keep moving the heat gun to keep from getting one great big hole! All of this sits on a satin gold card with a sun charm added at the lower right hand corner. The glitter in the sun rays and in the fabric softener sheet really do pop in real life. This is one card that is going to be hard to send off in the mail this week. LOL

Lets Link It Up

Image
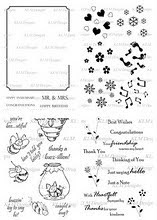
Ooooh over at Lets Link It up they are giving away the stamp set shown here, from DLM Digital Designs and Clear Stamps, just for LINKING IT UP. Go to http://letsinkitup.blogspot.com/ to how to enter for this give away. It really is a clever thing to do. I've entered and so should you!

Something Different

Image
Well, I know you all think I've been loafing about, not stamping anything or posting. But REALLY I HAVE BEEN BUSY! I just haven't taken the time to scan so I can post. :-O I made this card for a swap and since have changed my mind. It is a rather dull colored card, but it all works together i it's own way, especially if I had gotten it scanned straight! LOL Oh my, should put the scanned just a little lower so I can actually see if it is straight before I hit the button!! I'm not a short person by any means, but it does sit up on a shelf above the PC. OK, I have no excuse, as hard as I have been trying!!! There are three more below this one that I did do since my last post. Right now I'm working on some swaps ( 5 cards to get finished ) the designs keep rolling around in my head ( making a lot of noise ) but for some reason I just can't get them to the paper. OH NO I HAVE STAMPER'S BLOCK!

Water color: soft

Image
This is a card I made with one of my many water color technique turn outs from last month. It was such a soft image the lavender and gray back grounds just seemed to fit it. I added a lavender bow with a charm. In the charm I had stamped love on lavender paper and inserted it. I then filled it with glossy Essentials. Just a simple card.

Water color technique in black, white and gray

Image
I had stamped this Anna Griffin image using the water color technique ( from last month ) in black and then the second time with out re-inking to get the shadow effect. It started out a s a mistake, but I liked it so much I used it on this card. The paper flowers in the upper corner were cut with my Cricut and layered with a dot of puff paint for the center. A black ribbon with a white dash, from Really Reasonable Ribbon runs down the side.

Gingco leaves in 3-D

Image
I had these images laying around that I did some time ago. I had stamped and colored the image then made multiple copies of it, then let them lay around. LOL. The other day I got to messing around with them and this is what I came up with. Using little pot dots I raised the leaves inside the square, layered it on copper and thought now what? I liked matting it on blue and green but it just needed something else. Well, I still had a couple of images left, so I trimmed them out and tucked them here and there and left two in a falling position, with a strip of copper at the bottom. When I get ready to use the card I'll add the appropriate sentiment. Image is from: Stamp Zia

GC64 color challenge-red,orange & yellow

Image
Once again I grabbed by favorite sun flower stamp for the Gingersnap color challenge. This is such a simple stamp and sooo many possibilities! I stamped it on a light yellow cs then used my Tombow markers (? again?) to shade them in. Stacked then in a pretty little basket stamped image and tied a fabric ribbon around it. Polka dots and gingham just seem to go together, so the accent of red cs and red with white polka dot ribbon were added to make the color combo. Check out the other submissions to this color challenge here: http://gingersnapcreations.blogspot.com/2010/07/gc64-color-challenge-yellow-orange-red.html Not only is this blog a great place to hang you art work but the yahoo group is so friendly, and welcoming. ya otta give it a try!