Posts

Showing posts from January, 2013

Wine Journaling ????

Image
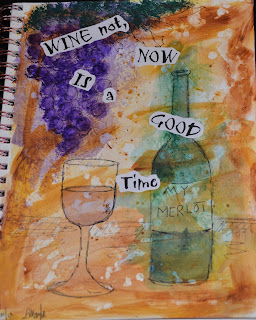
I knew that was going to grab some attention.....LOL!! So playing in my art journal and not really intending on any particular thing, this evolved.  Just some acrylic wash for the back ground, splatters and drips of water, then it was a "ya know that looks like grapes hanging there" moment.  That was all it took to wash in a little green and darken the grapes.  Once it was dry I took a Sharpie marker and sketched in the items. "Now is a Good Time" kept rattling around in my head ( t he echo was driving me crazy ) so I printed it out, but kept saying it is a little early, then "Wine not", pop up and joined the other letters. Okay, I do spend a lot of time alone.................LOL  So this really was a fast and simple page to do, but I like the way it turned out.  What do you think? Hummmmmm, Merlot is really sounding good and it is, after all 5 o'clock somewhere... (oh, it's 5 o'clock right here!!)

Lace flowers and tutorial

Image
Le Romantique Tutorial 2: Vintage Fabric flower and Flower Gem Centre - YouTube Here is a video that I found on You Tube that shows how to make a shabby chic flowers from lace.  So I decided to give it a try and here are my results.  I was doing this in the evening and when it came to dye the first one I didn't want to hit anything else with color ( I've yet to make me a splatter box for this ) So, there was a cold cup of coffee just sitting there.............yep! I threw the flower in there then set it on a towel.  After I did two more I decided it was safe to spray them with a little walnut ink. This bottom one is how they look before the coffee wash and now center embellishments.  I did cut the pointed tip off to make them just a little smaller.  I also dropped down to a 5 petal flower, 6 was just a little more than I wanted.  Fun project, I am hoping to use them on a shabby chic type canvas. I hope you take a moment to watch the video, it really is quite g

WOYWW 191

Image
      Here it is What's On Your Workdesk Wednesday and according to the rules (well there really aren't any RULES, just some friendly guidelines) Post a picture of your work desk, link up with Julia over at Stamping Grounds and then go a snooping through a LOT of blogs to see everybody else's desks. So here is my Betsy this week.  I had it all scrubbed down and clean as....as..... well, really clean LOL then I started getting caught up on a few things. On the left is a bag of valentine cut outs I'm thinking of using, my second set of eyes, toward the back is a set of appetizer spoons (don't laugh) I found these at the Dollar store and they are tiny and perfect for crafting.....I think (?) Time will tell.  So along the back are my tools a card I posted this afternoon and a DT card peeking there, thought I had that better hidden, a stamp with candy hearts on it, my CLEAN paint pallet, a glue cartridge my house and cell phone and in front of that are some c

Thank you Dream tag

Image
This tag was made for a thank you for a friend of mine.  Can't name names or give anymore information than that.......for right now.  While cleaning out a bunch of junk I came across a package of tags, the cardboard kind and wondered how long I have had them ( I guess that is too long LOL ) I made a point of laying them on my desk so I would remember that I wanted to use at least one of them!!  It started out white and I added some modeling paste with a pallet knife.  Once that was dry I used some Ocher colored Gesso to paint it. I had been playing with leafing for an other project and so I just added some to this tag here and there,  then darkened the edges with a burnt umber and then a black acrylic paint.  Two Inkadinkado stamp images in black. Some brown silk ribbon for the tie, 3 black Rhine stones and that is about it.  I need to make more tags, they are so much fun to do.  Well on the next great adventure..................... Inky Hugs Krisha

Valentine Time

Image
Oh MY! 10 days since my last post....ugh! AND it is Valentine time too.  This pretty pink and white valentine was a couple of experiments put together.  I embossed the card with a new 5x7 embossing folder.......LUV IT!!  Experimented with inking up the trim around the inside heart, you say I have done this before? Well yes but not with a dried up ink pad,,,,LOL  I wanted just the edge of the doilie to be the same pink, so I cut the edge off one to make a mask and ink the edge sticking out.  You say I have done this before? Yes, but not with a dried up ink pad....LOL  I trimmed the edge of the card with lace and silk ribbon.  The hearts are resting on pop-dots, so they are stacked up, not too high but enough to give it some interest.  I did add a pink silk ribbon bow to finish it off. So what else did I do in those 10 days?  I actually cleaned house and have been making myself spend a couple hours EVERY morning repeating the process.  It takes less time when I don't wait sooooooo

Fleur-dr-lis

Image
This is a Fleur-de-lis I bought at Hobby Lobby this last fall.  So it's been setting around here waiting for the holidays to be over, kinda waiting it's turn. I love Fleur-de-lis and have quite a few fleur-de-lis stamps.  It  began as a plain chipboard cut out, only 3 layers thick.  This morning I drug and began a to formulate what I wanted to do to it so I could enter it in the Unruly Paper Arts RAQ1: Fleur-de-lis.  I knew about what colors I wante to use, because I want to hang it in the hallway.  Unruly Paper Arts RAQ2: Joie de Vivre! or Joy of Living with a French flair.  So I rolled them together and this what I ended up with.  I painted it with a mix of Yellow Ocher and Gesso, while it was wet I laid a printed picture of the Eiffel Tower and a print of an old wine label, face down onto the wet Gesso and let it dry.  Then I wet my fingers and GENTLY started rubbing away the paper.  Then I added some Fleur-de-lis stamp images, and stenciled areas.  At the top and in the

Art Journal pages

Image
Right after Christmas and the last WOYWW for the year, I had my art journal on my work desk, background ready to add something..... This saying kept running through my mind so I added it to the pages.  It SO applies to art journaling, don't you think?  I have had a lot of questions about art journaling, now I AM NOT an expert by any means!!!  How do I know when it is enough? I don't LOL I do what pleases my eye and if I think there is something missing I post it to my blog and ask for help.  How do you get started?  well, a blank white page can be very intimidating, so add a color, any color and work from there.  One painting website I found said to always paint your canvas a base color, any color, then it isn't so intimidating when you finally want to start a painting.  Good advise, I say.  How do you know what to put on it?  Again I don't always have something in mind.  When I started these two pages I was just playing around with running ink, blowing it aroun

A Little Vintage

Image
WOW, it has warmed up today and I finally got out and cleaned up the corner of the house that collects all the leaves that blow off the house.  I even managed to bend over and pull some weeds :O . So much for exercise for today!!  Here is a little card I made earlier this week, feeling more vintage when I started creating.  The image is from Altered Pages and next to the Milliner Misses some of my favorite images.  She is stamped and layered up on die cuts.  I fussed up the edges of the die cuts and the edge of the card, made a brown ribbon flower and a rhinestone for the center.  A little "thinking of you" stamp from Inkadinkado and 2 more rhinestones to finish it off.  This is the card that drew some comments on WOYWW post.  I love the sephia look when going vintage.  Sorry about the lopsided scan, it was quicker than grabbing the camera when I walked into the craft room. Now for a little snack-y-chocolate I think............

WOYWW 189

Image
  Well, I dare say it's THAT time of week in Blogland, YEP! it's time for Whats On Your Workdesk Wednesday. So tonight (Tuesday in US) I snapped a picture of Betsy before turning out the lights, turning off the PC and turning in early to watch a little TV. From right to left there is a tin full of die cuts I mess about making yesterday and still haven't found a good home for them. Some clear heart stamps, a container with misc pen and pencils, a container with all my tangle pens, wire storage for misc. items, a ribbon rosette, water pot, a flower vase with glues turned up side down, two cards, one I posted this morning one to post tomorrow. Cell and house phone in wire basket, an old sketch pad I found while digging around and on top of that are a few templates for tangling and in the center is my art journal I was playing with this evening, not sure if I'm finished with it or not, need to be away from it for awhile then come back and take a look. So where do y

Tangle Tiles

Image
It has been very cold here in California for the past couple of weeks, well, for us it has been cold.  Dropping down to 25' at night and only reaching around 48' during the day.  You have to remember I live in an agricultural area, in the San Joaquin Valley, and these freezing nights are hard on the oranges, lemons and grapefruit, but the bulbs in my flowerbeds are loven it!!  When the weather gets like this we use the wood burning stove in the living room to keep things toasty warm.......in the living room, dining room and the kitchen that is.  Down the hall and around the corner to the craft/office room it gets quite chilly!!  So I have been in that part of the house quite a bit.  I've been grabbing some tangle tiles and messing about with them. I usually just do them in my tangle journal, cause I thought the 3 1/2" x 3 1/2" tile to be too confining, but had read a challenge on one of the blogs. ( Wish I had paid more attention to where I was, cause I can'

A White Card

Image
Happy Tuesday!!  Gosh almost a week since my last post, I have been busy, really I have!  Vicki has a challenge up on her blog for "White as Snow" and I thought I'd get back in the saddle and join the challenge with this card.  My first thought was "Oh easy peasy", well it turned out that I had to think a little more about it! LOL  I needed a birthday card for my DIL next month, but her favorite color is purple ........ a long way form white.  I used and embossing folder  and of course white cs, to get started.  Cutting the center out in graduating sizes, I then mounted each size onto a solid white cs and glued them together.  To make the sentiment stand out I used purple ink for the image and then edged it with the same ink.  Adding three purple rhinestones finished the card.  A very CAS card, but I really like the results, especially after making all the shower invitations. LOL. This is the second week of the challenge but there is still time to join the fu

Center Pieces.......DONE!

Image
All four on the dinning room table  Baby shower center pieces are now finished! Yahooo!! Not that there were that many to do, but a lot of hand work involved this time.  Now, ( as I have been telling myself for over a week )I need to pay attention to the rest of the house. LOL Like that is going to happen today when I have a weekly planner printed out that needs to go together and prepared to log some of the challenges I want to join in. There are also some birthday cards to make and Front view back view with ready mix truck  of course Valentines to make. Betsy(  the name of my desk top, named on a whim ) is ready for some stamping and card making. I usually just make Valentines for the GK, but it is also one of my DIL's birthday. Also need to make new file folders (2013) for DH's business files.  Lots to do so I better get started if I want to pick up a stamp today!! LOL Have a GREAT weekend! Here is how the bears started, you can see how I applied the water

WOYWW 188

Image
  HAPPY WOYWW!! Hosted by Miss Julia Dunnit over at the Stamping Grounds. http://stamping-ground.blogspot.com/2013/01/woyww-188.html  Gosh this week has vanished in the blink of an eye!  Betsy is still presentable .... LOL.  Last week I worked on all the invitations for my DIL shower, this week I am working on the center pieces.  Yesterday I worked on the bears for the sides of the containers. ( more about those later ) These are what is on Betsy, along with a couple other items I made that will also be used for the center piece.  My son owns a ready mix plant and a ready mix truck,so for him there are the trucks, on the drum of the truck it says "Daddy's Little Mixer Driver" I used a clip art image for that., then there are the ovals, a repeat of the ones that were on the invitations, with ribbon running through them.  I have other baby items to use and a few more things to make before putting them all together, but feel I have a good start.    Now hop on over to

Found a way to upload pictures

Image
Okay, so Blogger still hasn't fixed the upload from PC problem, BUT there is a little link that says Picasa Web Album that I did some exploring on.  Wa-La! it shows all the pictures from your blog.  So this might not be new to some of you, but I'm not real savoy on some of these things. LOL Anyway it is a place that you can store photos on, uploaded for your PC, then onto blogger.  A little slow, but it works. So, here is the shower invitation that I ended up making 28 of.  All the wording is PC generated, then using my dies I cut the ovals.  The edges are stamped with 2 of a set from Hero Arts, yes individual stamps!!!  The background paper I created on Publisher. This is the inside, all PC generated.  I know I didn't block out the info, so if your planning on attending make sure you bring diapers and wipes........ LOL Proof of the quantity for PJ.  LOL So there they are 28 cards ( well pic of 21 of them) for the month of January, MY personal best to date!!!

Blogger says NO Uploading Pictures for You....

Well, if that isn't a fine Happy New Year.  I can post but not upload any pictures!!!  I went into Google and they said it is only happening to some ( guess my number was up ) and they are working to correct it. BUMMER!! I spent two days working on 21 baby shower cards and wanted to share them.  Now 21 cards for the first week of the new year is a record for me and I did want to boast ( just a little )  Guess it really is "Pride goth before the fall!"....... LOL So all I can say, at this point, is stay tuned...........

WOYWW No room for Grandma

Image
Hannah gos right to work Megan is learning to emboss with the purse Hannah is teaching Megan what they can use Hannah is letting Megan help turn the handle of the Big Shot Wednesday already. and I am late getting getting this posted ( but it is still Wed. in the US) and I'm pulling some welcome Grandma Duty!! But it is still a WOYWW and time to do some peeking around the world. Keeping it short (the kids are ready to skate) Hop over to; http://stamping-ground.blogspot.com/2013/01/woyww-187-arrrgh-edition.html   Link up a picture of your work desk and join the fun.  Unfortunately I don't get to peek until later tonight, so if you stop here and leave a message I'll be back around later tonight. Happy WOYWW Inky Hugs Krisha