Posts

Showing posts from February, 2012

Thers is Music in my Soul....Journal pages

Image
 So today was just play in the journal day, my last post was the first two pages from this morning.  These two pages were completed after making a run into town to pick up DH and run his errands and take him to the dentist.  Actually he dropped me off at Beverly's Fabrics and went to the dentist while I got to shop.  I was only looking for white Gesso ( which all they had was black ) and some quick adhesive.  I did get the adhesive, some Tombow tape runners ( on sale ) Tombow velum tape runner ( on sale ) 2 embossing plates from Darcie and a Spellbinders die.  I had a 40% off coupon for the dies,, and I did put back the pack of paper that was 40% off.  The last pack of paper I bought is still in the bag right over there next to me.  So any way the first thing I used was one of the embossing plates from Darcie......sheet music.  After I embossed it I tore the edges and used a chalk ink pad to rub the color onto it.  I then used a pom ...

Journal Pages.......Life

Image
Feeling creative juices flowing and not really wanting to be confined to a card or tag I grabbed my journal, some paints and inks.  With no particular theme or style in mind I just "Started" first with acrylic paint thinned with water, letting it run down. Then at the bottom and let it run up ( ya know it won't run up, so turn the book up-side down LOL )   I took the embossing gun and kinda maneuvered the paint as I dried it, had a really neat effect come from that!!!=0  Ink was drop onto the page and then I blew through a straw and pushed that around.  Took a paint brush and painted with the ink in places and let it dry.  On the left side I added a piece of a page and played with that.  I added some crunched up tissue paper to spots and let that dry ( well let it dry with the heat gun, I'm not one to sit and watch paint dry ) It felt too dark so I scrapped some whit paint over areas and let that dry ( yea again ) I remembered Hels form the ...

In the Garden

Image
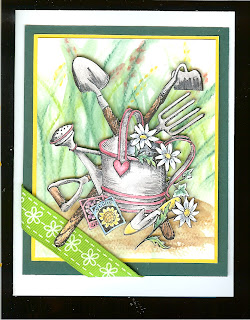
http://sirstampalotchallenge.blogspot.com/  The Challenge is in the garden.......such a good theme for this time of year as everybody is starting to think about flowers as the weather starts to warm....or is it just wishful thinking???    For the background I chose a pieces of water color paper and used water color pencil oi create the grass and flowers, then washed it with water to soften the effect.  The image was stamped and again I used water color pencils to color it in.  I trimmed the image and used pop dots to raise it off the background.  I layered it on yellow then dark green and added a piece of ribbon from a wrapped scone. ( yes, I keep every scrap of ribbon )  Ali over at http://www.vintagepagedesigns.blogspot.com/  also threw down the gauntlet of using up some of the stash.  So I have taken her up on it and only stash materials were used on this card.  My stash has reached mountain size and I really need to get a ton o...

February sketch challenge

Image
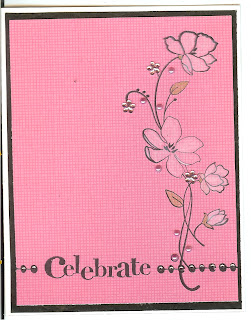
Good Monday morning bloggers!  This morning I am posting a card for the challenge over at Prickley Pear blog .  I thought the sketch was very inviting so I decided to play along.  My card is very simple ( sorry about the crooked scan, that tends to happen late at night LOL ) On a pink pattern paper I stamped the flower image from Inkadinkado then softly colored the image with colored pencils.  I still wanted the pattern to show through.  The sentiment was added at the bottom, instead of ribbon.  I added the embellishments (  rhinestones and pearl ) to the floral and sentiment.  A very simple card to make and I liked the softness to it even though I used a bright pink print paper.  You can check out the sketch and join in the fun at:    http://www.prickleypearrubberstamps.blogspot.com/2012/02/february-sketch-challenge.html

Two Challenges with one card!!!

Image
Happy Friday to everybody, it is definitely a TGIF day for me.  Over at Card Patterns they have this sketch to follow, something a little different and quite a challenge. This is the card is for the challenge at Paper Play.  Their challenge was for "Mother", and for the above sketch challenge.  I was digging for something and came across these stickers and they made me think of my Mom.  They are 3-D and have glitter on them, sorry the scan doesn't show them well.  I stamped the background of the card with a soft green ink first.  I cut the grid (it looks blue but it is a lavender) with my Cricut and mounted that onto a light green vellum and then mounted it to the card.  I tucked the floral stamps under and over the grid.  I chose a double lace trim with pearls down the middle, but trimmed off one side to get the effect I needed.  The cream bow finished the trim.  I added two pearls at top right and a small butterfly sticker to the...

A little splash of color

Image
Quite a simple card really.  This stamp seldom gets used and I need to break that habit, it is so elegant.  So over at the Creative corner they are having a challenge of black and white with a splash of color.  I think this one will do.........hope it's a winner! You can check it out at: http://ourcreativecorner6.blogspot.com/2012/02/black-and-white-with-splash-of-colour.html   This card should also qualify for the Gingersnap Creations challenge to, only 2 colors at: http://gingersnapcreations.blogspot.com/2012/02/gc140-color-challenge-two-colors-only.html Want to be winner????? Can't do it unless you drop by and join these great challenges

An other Rouge Red Head card

Image
I just can't seem to leave this stamp alone, I just love it.  It is from Rouge Red Head Designs. Thinking of old photographs,  I stamped the image in brown, masked off the edges and rubbed more brown over the image, then removed the tape, wrinkled up the picture and aged the whole thing again with brown ink.  ( that was rather lengthy )  I wrote names beside each woman, like my Mom used to do.  A strip of my new ribbon from Really Reasonable Ribbon was added over the corner of the card and brown rhinestones on the top and in the center of the floral image.  My co-worker flipped over this when I was showing it to her ( my #1 fan at work ) I ended up giving it to her........she always is sharing her pretzels with me............good trade!!!

It was a quick and simple day

Image
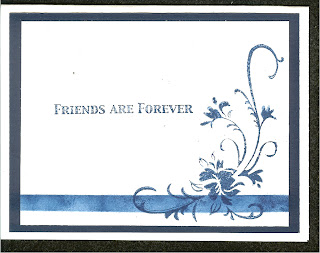
Last week I took an afternoon to just do some quick and simple cards, and enjoyed the time, and the soft jazz in the background to create these four cards.   Friends are Forever, in blue and white was created by masking off the stripe at the bottom and sponging in the color.  Inkadinkadoo provided the image and sentiment.               Just Because was made by masking the pink flower and repeating the image to fall be hind it.  I colored the focal flower with colored pencil, added a stripe of green ribbon and a pink circle with the sentiment on it.  This black and white card was created by using a regular graphite pencil to shade in the flower.  I trimmed the bottom of the card to leave the leaves hanging of the bottom.  I added a strip of black and white paper to the top and to the bottom of the inside of the card.  Just a little twist from what I normally do, someti...

Mardi Gras

Image
Ok, I missed getting this posted yesterday, and then this morning I find that I didn't get the camera photos uploaded, can't figure out what happened to them, and had to start all over again!!!!!!!Is this the second Monday this week???? LOL I really have never attempted any Mardi Gras art before, but I was searching the Internet and the masks really caught my attention, such beautiful things. I came across some templates and decided to give it a try in my journal. It was really a fun 2 days........ink, glitter, feathers, ribbon, metallic paper, EB, embellishments all add to the fun of creating thee two pages. ( Sorry, this mornings scans are one at a time)  Maybe next year I will be smart enough to get a draft ready before hand.............but I seriously dought it! I wish the scans were better, they are so colorful and sparkly.  Thanks for taking a look and have a great day.

Twinichies art exchange

Image
The Gingersnap group is having an other art exchange "Twinichies" 6 for 6.  These are my 6 that were sent out for the exchange.  Twinichies are 2" x 2" works of art.  I chose chip board for my backing, and UTTE embossing powder for the top, along with inks, glitter, and fine colored EB to create the top.  While the EB were still in liquid form I inked up my chosen stamps and pressed them into it.  Embellishments were added with glue or reheating the EB and sinking them into it.  This technique takes some time, but mistakes can easily become part of the art.  I find this so amazing due to the fact that you can maneuver the EB with the heat gun causing a marbling effect or just moving the colors around.  Hope the recipients like them as much as I did making them.

What a MESS!!!!!!

Image
This was my first thought Saturday morning when I walked into my craft area.  I had been working on some twiniches, using UTEE, and pages of my journal at the same time and it was a MESS.  I went to photo the journal for a later post, then decided I need to clean-up some what.  LOL I started thinking ( big mistake ) I would have a little more room if I moved some of these things around. So this is how I spent my Saturday.....all day! First I had to put some things away.......or so I thought.  Glad you can't see all the UTEE and mixed embossing powders all over the place.  Being right handed everything gets tucked to the right for future put away.........never seems to happen.  After scrounging around for some extra storage ideas, and moving things here and there ( ya know sometimes ya have to try it, stand back  and then make a judgement if it is going to work, sometimes repeating the process) It finally started taking shape. I didn't show you wha...

New Shoes Cure the Blues

Image
......well it works for me! LOL This is a quick birthday card for a co-worker, the inside reads "But Chocolate Does The Rest" and I added a small candy bar to the inside next to the sentiment. I had gotten her a special piece of candy, put it in the fridge and went to make the card.  When I went to get the candy, my DH had eaten it!!!  I made him go to the store and buy a whole bag of small candy bars.....the ole poop!  I love this shoe stamp, and have used it for numerous cards.  It has dots that I covered with rhinestones, all else was colored with markers.  I trimmed the bottom of the card, then lined the inside with a strip of matching green, added some rhinestone flowers and called it good. Shoe stamp is from Rubber Necker Both sentiments are from Uptown Rubber Stamps

Last of the Valentines

Image
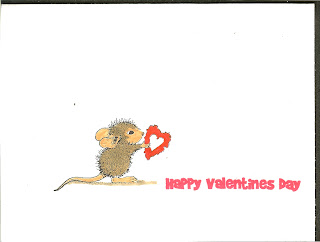
The crisp clean cards I have viewed over at the   simplicityblog   inspired me to make the last of my valentines for my granddaughters.  I'm sure everybody recognises the cute little House Mouse stamps.  I've had a collection of these since they first came out, finally had to quit "collecting" due to shortage of space, as I have kept them all mounted on the original wood.  I added the sentiment form Crafts Mart, an inexpensive stamp I have really used this year.  The second card I added a few drops of red, as falling ink from the pen.  Everything is stamped right onto the cards the colored using markers.  I really like the way these turned out, and forgot how hard DTP can be at times.  Thinking about doing more of it.........I know, I know layers are one of my many habits. LOL

Butterfly Wishes and Dragonfly Dreams

Image
This journal page started out to be things with wings, but once I started with the butterflies and dragonfly stamps I kept thinking Butterfly wishes and Dragonfly dreams..........so that is what I ran with LOL. I kept eyeing my soft lilac ink pad until I finally plucked it from the stack and rubbed it over the page along with a soft sage ink pad.  Then I stamped the images using the same inks......to soft ( sounds like the beginning of the story The Three Bears ) So I went to layering the images, starting with black and then to gold embossed images.  The little scrap of designer paper helped make the bottom corner.  Sentiment is hand written. Images are from G studios, Solos and Inky Wings.

Second journal page for a GC 137 challenge

Image
Second page of my journal consisted of white paint over a brown background that had been rubbed with inks to get the bleed - through background.  I added some flowers that I had cut out of larger sheet and placed them here and there, while the paint was still semi wet, then pulled the paint onto the flowers. This gave it a dry brush effect.  Once I let everything dry I added the flourish and sentiments with red ink.  I really like the soft feel the dry brushed paint, and the red ink added.  I am entering this in the gingersnapcreations.blogspot.com/2012/02/c137-chestnut-theme-challenge-words-of.html 

A Critter Sketch Challenge

Image
Yep! This is my entry for their 100 Blog post, I think that is just great, and the blog hop held lots of eye candy!!.....and yes I made it to every blog!!!!!!  Everyone should check this out: http://critterchallengeblog.blogspot.com/   It only lasts until Feb.5 and today is already the1st.   So the excitement lead me to making this card in lovely yellows and greens..............thinking spring already! LOL  I don't know who the image is from ( I've gotten bad about that with the clear sets, sorry ) The flower is actually a solid yellow and a print, the print is in the middle and around the edge, and the stem and leaves were stamped on the dotted green.  So the two prints became my background papers, but the one right under the flower is a piece from my stash ( well, really they all are ) It is a background paper I received years ago in a swap and it is my very last piece of it. :(  The sentiment is from SOLOS.  A couple of brads and a match g...